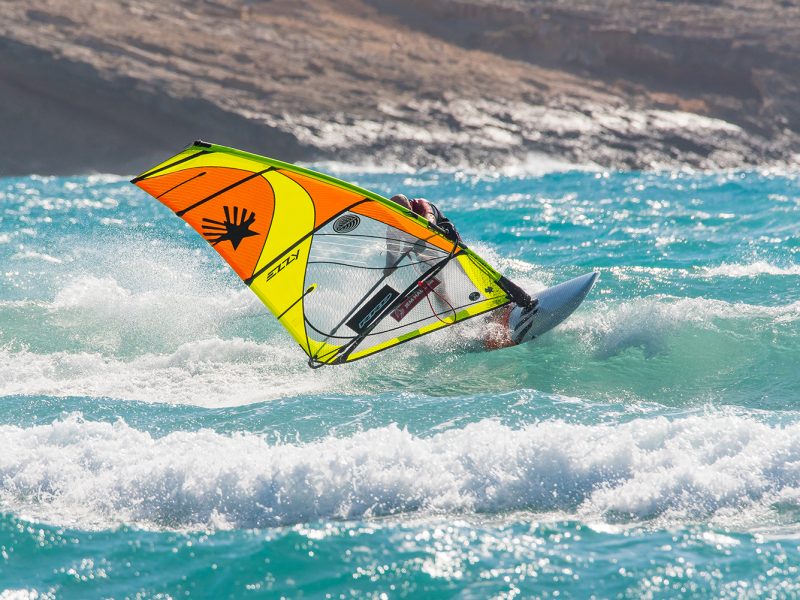
JEM HALL: ONSHORE RIDING
JEM HALL
MOVE ON UP – WINDSURFING TECHNIQUE
ONSHORE RIDING
From our May 2022 issue of Windsurf Magazine, our technique guru Jem Hall explains about onshore wave riding.
PHOTOS – Eye Sea You Photo
This month I will follow up on my ‘Onshore Tips’ in the March 2022 issue with pointers on riding onshore waves.
PREPARATION
The moves below will help ready you for some backside carving and also help you for all wave riding. In essence you have been used to keeping the board flat and banking it for the corners only, now we are looking to help you get more fluid and boost your ability to counterbalance and anticipate changes in direction. Ready yourself with:
Tacks: yes I know I go on about these a lot, however backside riding is commenced with some heelside carving, as is the tack. Focus on carving upwind, and looking, and getting the rig back as the hips move forwards and out.
Carving in a straight line: this is super fun. Unhook and carve a little upwind on your heels and then change direction to your toeside and see if you can throw up some spray going both ways, while being fluid and keeping speed.
Wiggle on swell: in open sea conditions build on your flat water carving by doing the same on swell and look to stay on the swell and use its energy. One tip is to carve back down (wind) the swell way before you reach the top.
Upwind 360s: this is covered in a previous piece and you can do them both planing and non-planing and both will boost your steering, counterbalance and vision.
Gybes: really focus on getting the sail open mid gybe and seeing the clew, whilst shifting the rig to the outside and your hips to the inside.
Pivot gybes: this is a slower, shorter arc gybe and I will be covering this later in the year.
Chop hops: with good speed, and whilst well powered, carve off the wind and then carve into the wind and pop off a nice bump. This will jazz up your rail changing and help you get some backside aerials as you want to do those, don’t you?
TECHNIQUE
Here are some further tips to help boost your backside rides:
Head, hips and hands: the moves I have suggested will help you move your head and hips way more, yet to take it further I find it helpful to really focus on where I am looking, or where my hips should be shifting too. If we exaggerate looking upwind as we carve on our heels and then turning to look downwind as we carve off our toes, our turns will really benefit. Lastly, as it all comes together, you can think more about your hand position on the boom.
Feel the flow: you are aiming to make this fluid, so go with it and know that sometimes it will work and feel so good, and other times not so much. It is all part of the journey.
Use the wave: this will get you choosing better waves and where to turn on them. Think about this in reflection after your turns / sessions too.
Gradually increase rail pressure: at first you are looking to just make some easy turns on the wave and not change direction too much and then as you progress you can go harder.
Come away from the wave: this is a massive tip for all riding, yet in onshore as people are looking to carve up the wave they can begin too close to it. It can really help to drop down away from the wave before carving back up it.


EASY MISTAKES
Here are some errors we can all make so you can look to avoid, or identify them:
Wave selection: from too shallow or small for effective riding, to too steep and hollow if your timing is not yet on song. Choosing the right waves will get better with experience and these will yield our best rides.
Too many turns: this is the same for frontside riding, as people can often wiggle away through 4 or 5 turns when it is best to focus on just 1 or 2.
Too much frontside: I have witnessed many people in onshore conditions trying to go frontside too much, when they would be best to work on, and enjoy, some backside riding, as frontside in onshore winds is hard, very hard!
Too close to the wave: this will mean you will have less time to change rails and will likely not have enough speed. Give yourself some time, space and speed and get away from the wave before you carve hard to go up it in your bottom turn.
No trust: an example of this would be not falling over on your toeside rail enough in the top turn, and thereby not trusting your rails. Or it can be, as you progress, not trusting on the rig to push you back upright as you fall over onto it and push out on the back hand.
FRONTSIDE
Going frontside in onshore is very technical and an article in itself, so for now I will just give you a few tips to consider:
Use the wave: I will often use a backside setup turn on a nice section to help the board point downwind to go frontside.
Keep looking: have a good look up and down the wave for suitable nice sections that are holding up.
Lean forward and throw the sail open: and move the back hand really far down the boom to help this.
Choose an easier angle: in cross-on or cross to cross-on, frontside is way easier than in straight onshore angles.
Move late: in the top turn, it is best to shift your back hand up the boom, towards the lines later than you would in side-shore for example.
Look: and I mean really look out of your top turn as this will open the sail and help it not oversheet, or worse still, backwind.

BACKSIDE AIRS
Just as for frontside riding, their can on occasion, be sections of the wave that are not so good for turning, as there is not much of a wall, and the wave may also be breaking quite fast too. In such cases, going for a backside aerial (air) is a great option. The plan here is to go along the wave and hit the breaking section and jump off of it and then land on, or, preferably, in front of the wave. Here are some tips for the easier version where you just do a jump and steer in the air, as opposed to the pro version where you are really sending the bottom of the board into the air and pushing out the sail, like in a shove-it.
Scan: look for a suitable section that is breaking faster and with a bit of energy.
Easy line: head more along the wave towards this section, as opposed to coming away and doing a big turn. This will give you the speed to make an easier jump / air.
Pop first: for your first attempts, go along the wave and just pop off the section, as you would for a jump, and then really try to steer the board downwind in the air. Looking downwind, towards the beach, really helps achieve this.
On your toes: if you pop a lot off your toes as you hit the section, then the board will bank over more, exposing the bottom to the wave, thereby taking valuable energy from this section. This will give you more height and then this will be way more fun and give you the time to steer.
All in the legs: after you have popped, really scissor the legs, pushing off on the front leg, pulling up and in on the back leg.
Send it: as you get better at this move you can look to hit the section later and exaggerate falling over onto your toeside more. Pushing out on the back hand harder, to backwind the rig, will also help you to throw the tail out and tweak the board.
TUNING
Changes can be made to assist your onshore turning.
- Change your fin/s down for more looseness, e.g. moving from a 20 cm centre fin to an 18.5 cm or 17.5 cm is amazing on a tri fin.
- Outhaul tension: flatten the sail if stacked or open up the sail to get more speed.
- Boom up to help keep speed, or down to get more control and help you ride better.
- Mast foot back to help the board turn tighter, or forward a cm or 2 if it is bouncing too much.
- Shift your straps wider apart. When using bigger boards, as is de rigueur in onshore, we may need to make them looser. Moving the back strap back a hole or 2 can really make a big difference.
- Tune and reflect, and record any actions made and how they helped or didn’t help so you can find out what works for you.
- Big is beautiful – looser straps will help you change rails and really flex those ankles, and also kick the board off your feet if you wish to eject.
Ezzy sails, RRD (boards, wetsuits & softwear), Chinook & Black Project fins sponsor Jem Hall. Get him live and direct on one of his highly acclaimed coaching holidays – check out his website www.jemhall.com
for details. You can also follow him on twitter / Facebook / Instagram.
The post JEM HALL: ONSHORE RIDING appeared first on Windsurf Magazine.